A common theme with projects at Element 84 is bridging the gap between data collection and its presentation to end-users. With satellite imagery, there is a pipeline of processing steps used to transform raw data into the imagery we see on our computers, phones and tablets.

Basic Color Correction
One of the important steps in this process is Color Correction. The image sensors flying thousands of miles above the earth operate and collect data under much different conditions than the cameras in our pockets. In this example, I downloaded a snapshot of Washington DC from the Landsat 8 dataset (https://www.usgs.gov/land-resources/nli/landsat/landsat-data-access).

You’ll notice that each scene has been captured across 11 different bands ranging from B1-B11. The red, green, and blue (RGB) bands are B4, B3, and B2 in this set. You can combine these bands into a single image using the ImageMagick CLI:
convert -combine
~/projects/washington_dc/LC08_L1TP5033*_B{4,3,2}.TIF ~/projects/washington_dc/RGB.tif
A second ImageMagick tool can be used to bring the washed out colors to life:
convert -sigmoidal-contrast 50x16%
~/projects/washington_dc/RGB.tif
~/projects/washington_dc/RGB-corrected.tif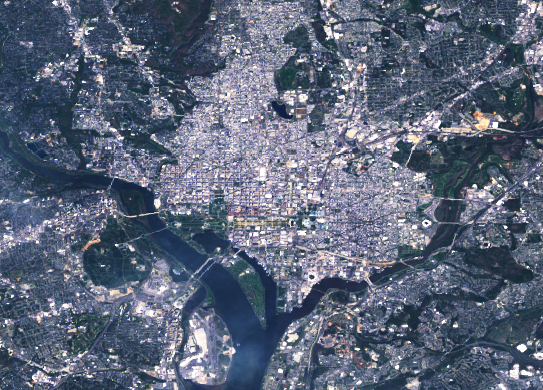
The end result should have color that we are used to seeing.
Colors Underwater
Another condition where cameras need some assistance is underwater. As you descend below the surface, the colors in the spectrum begin to disappear one by one. As this occurs, objects begin to appear murky and washed out.
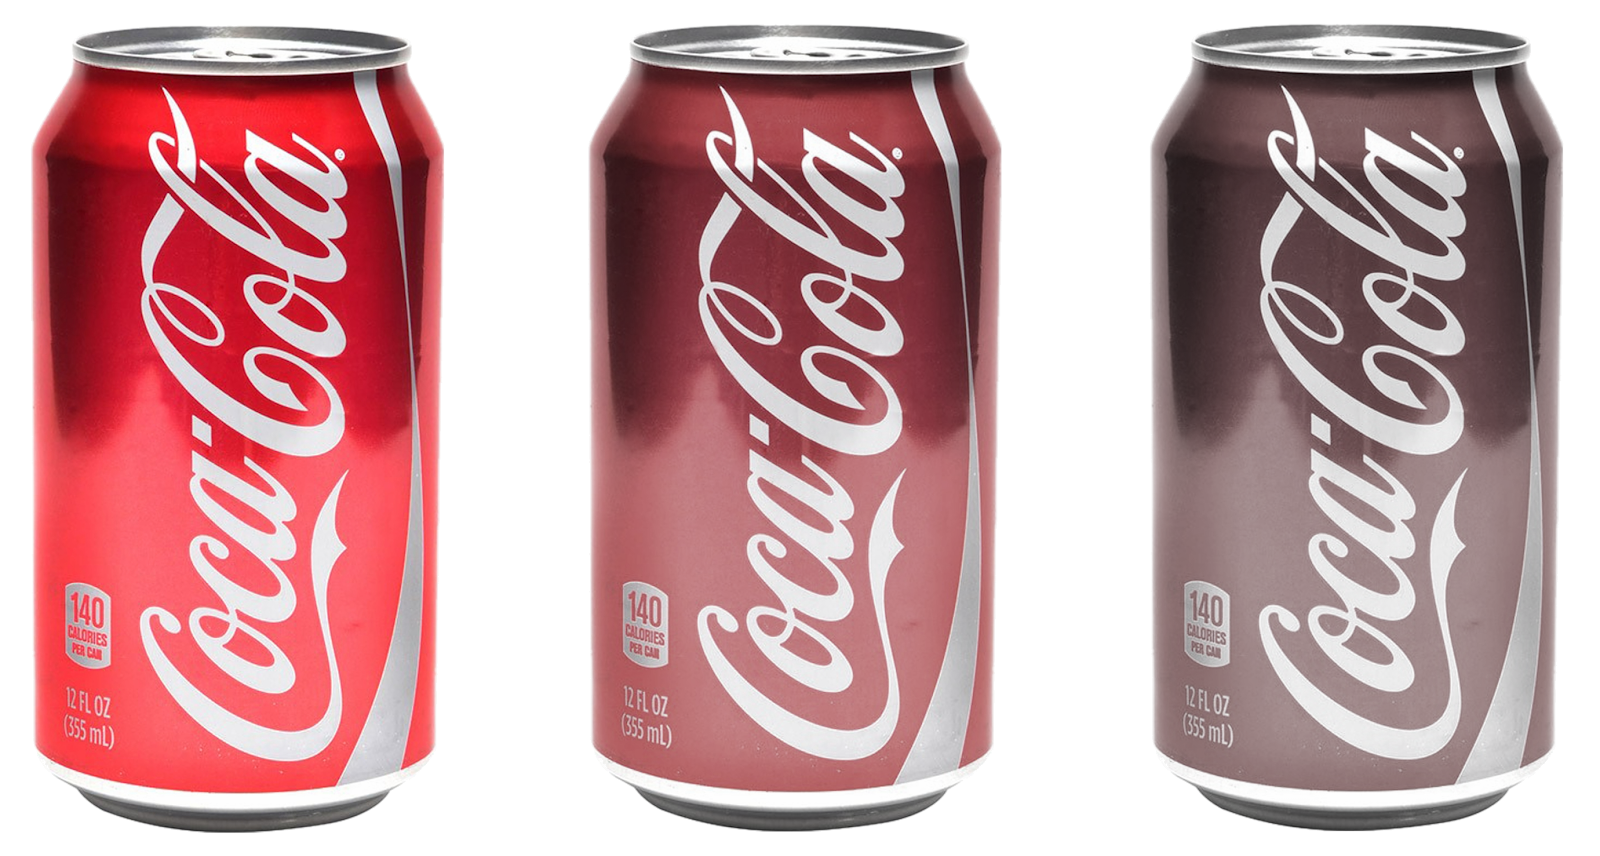
The depth that fading begins is different for each color. The soda can above is red, which means the color would disappear at a depth of just 25 feet. The chart below illustrates the effect of water depth on each color band.
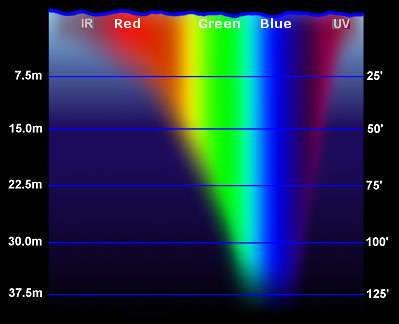
The basic Open Water diving certification allows divers to descend 60 feet beneath the surface. More advanced divers descend to 100 feet and beyond, typically in search of interesting sea life and shipwrecks. It is common to dive with underwater cameras, used to capture photos or video. As most of us know from years with a camera phone, cameras are generally poor when it comes to capturing low-light conditions. This means that each color disappears even more easily on film than shown in the chart above. The result is that divers routinely end up capturing scenes that appear much more dark, green, and murky compared to what they saw with their eyes.
One tool divers use to help counteract this effect is attaching a lens filter. A red lens filter helps to strengthen the red color band, counteracting some of the impact caused by the water depth.

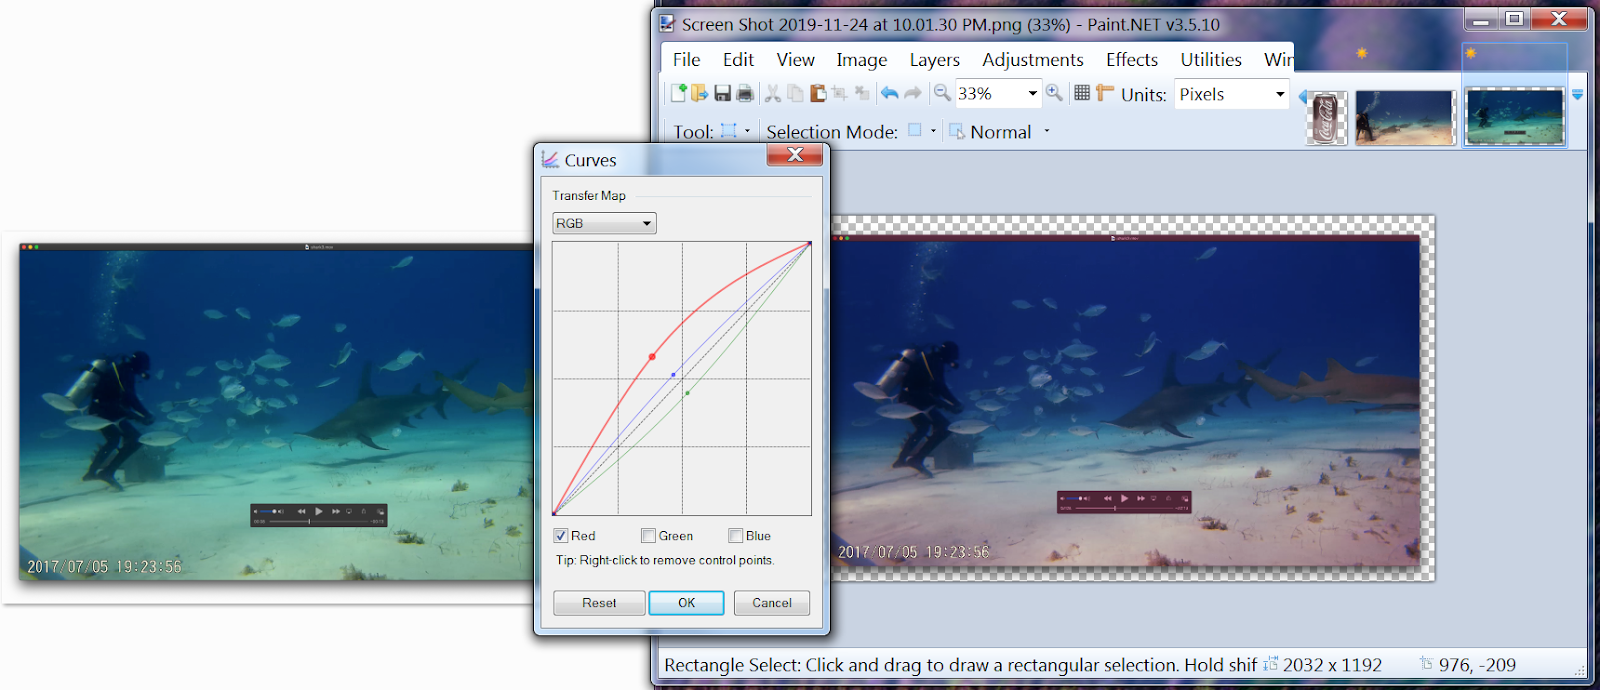
In many cases, post-dive correction is still needed in order to restore the scene to a more accurate color pallet.
Importing a photo or single video frame into a free image editor (in this case Paint.NET), each color band can be adjusted individually until the most accurate levels are identified.
In my case, the set of coordinates that I feel work best are:
- Red: [0.396, 0.670]
- Green: [0.525, 0.451]
- Blue: [0.459, 0.517]
These RGB coordinates can be used to easily correct both photos and video from the dive. To correct videos I used the free toolkit FFMPEG (https://ffmpeg.org/ffmpeg-filters.html#eq). The command below applies the RGB coordinate values to the entire video clip:
./ffmpeg -i input.mov -vf curves=red="0/0 0.396/0.67 1/1":green="0/0 0.525/0.451 1/1":blue="0/0 0.459/0.517 1/1" corrected.mp4Taking it one step further, we can use the filter_complex tool to put our old and new video clips side by side for comparison:
./ffmpeg -i input.mov -i corrected.mp4 -filter_complex "[0:v]crop=iw/2:ih:0:0[left];[1:v]crop=iw/2:ih:ow:0[right];[left][right]hstack" side_by_side.mp4The final result:
